Search This Blog

Wednesday, December 9, 2009

Better Limber Holes


This article from Professional BoatBuilder has excellent ideas on designing bulletproof stringers and bulkheads that will last. It talks about the issue of limber holes, those passages through bulkheads and structural components to drain water to the lowest part of the bilge. "The Humble Limber Hole" by Bruce Pfund TJ and I plan to take a few pages from Bruce's book on the new stringers we'll be installing. Check it out.

Friday, December 4, 2009

Stringer Appeal

Installment XX in the chronicles of a Mako classic restoration

We are now ready to make some progress with stringers (longitudinal reinforcing beams on the hull.) The original stringers were marine plywood covered in a heavy fiberglass woven roving cloth and wet out with polyester resin. Holes called "limber holes" were cut to allow water to drain to the bilge. These vintage limber holes are a horror show. A hole saw cut through the beam left exposed wood core. Water migrated in and rotted these areas. The rotten core shows black through the fiberglass. Notice the cracked areas.

These beams bear the brunt of force when pounding through waves. Hard spots and rotted core spell failure.


To remedy this, our task is to grind these stringers off and replace with new. Rotten core has minimal strength and must be extracted. Spot repair and/or sistering in stringers supports is the easiest route with least time and expense. We're going for the gold- grind the old stringers flush, then replace with foam core stringers. We chose these pre-fabricated stringers by Prisma. Prisma Composite Preforms come in complete sections, ready to wet out. The fiberglass fabric is already bonded to the foam. Just bed in place then wet out.


To spec out the stringers, we carefully measured and snapped extensive pictures of the current hull stringers. Measurements should include:
  • angle of deadrise (angle of the hull to perpendicular)
  • length of each stringer
  • depth of each stringer


We then emailed this info on to the folks at Prisma for technical consultation.


Without stringers, this boat will be loosey goosey. One concern with the upcoming phase will be to maintain hull shape. We must support the hull prior to removing the stringers to minimize distortion. Temporary braces across the gunwales and supports under the hull should maintain hull shape as best possible.


Commonly decks rest directly on hull stringers. Notice this boat has separate reinforcements for the deck, which floats above the stringers. (see 2 remaining nubs in middle) We have the option to replicate this or just mount directly on stringers.


This perspective shows the taper of stringers meeting the rise in the bow.


Thanks for joining us, and please check back for more.

Thursday, December 3, 2009

Transom Wrap-up

Installment XIX in the chronicles of a Mako classic restoration

We measured out 5 parts 105 resin to 1 part 205 hardener by volume. When metering large amounts, it's much easier to pour than pump. This is where graduated mixing pots come in handy.

We wet out the first two biaxial strips on the table and transferred them to the boat.


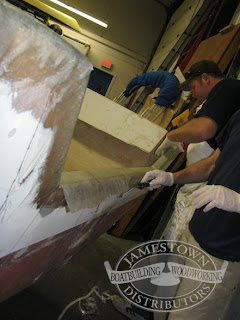
We then proceeded wetting out the 6 ounce cloth, laid it in place and bubble busted once again with the laminating rollers.


Gloves are getting pretty tacky at this point. Layering gloves is the way to go- just peel off a layer and keep on rolling.


We made incisions in the dry cloth at each of the sharp bends of the transom notch. The cuts are needed for the tape to lay flat. To make sure they aligned we marked the port/starboard sides with a permanent marker.


Murphy's Law- the worst possible time for an irresistible itch on your nose


Bubble busting with laminating rollers.


Holy cow- is that the time? Let's call it a night. Before heading out, dunk those laminating rollers in an acetone bath if you wish to use them again. Otherwise they become more spreader than roller ;P