Search This Blog

Thursday, May 20, 2010

Bridge the Gap

Installment 35 of Classic Mako Blog

We have a hole to fill. Well, ok, actually a bunch, but let's talk gunwales here. This pic shows the cut made to re-core transom. Three layers of cloth now cover that exposed core, but the gap on the rail is still there. Time to fix that.


We ground a wide bevel around the bonding area.


Might as well grind out this crushed fiberglass on the corner edge and glass that too.

We came up with this high tech mold for extending the splash rail shape ...

High tech cellophane wrap for mold release


Quadraxial cloth wet out with epoxy makes for quick bulk build-up.


All cured, we're satisfied with the rough shape of this first layer. Several more layers, each successively wider, will finish this repair.


Prepping for the Nose Ring

Installment 34 of Mako Reconstruction Project


We drew straws to crawl up under the bow and yank out the old boweye and backing block. I lost. How is it each and every boat has one incredibly uncomfortable spot like no other, and at some point you have to stuff yourself in it. This wood backing was in surprisingly good shape for 30 plus years abuse.

But continuing our modernizing theme, we're going to replace this wood with some rot resistance material.


We grabbed some scrap penske board left over from the transom job. Since the 3/4" thickness wouldn't cut it, TJ grabbed some 5 minute epoxy and bonded two strips together.


We then cut it to shape with a carpenters pull saw.


I buttered the area first with epoxy thickened with cabosil and 407 filler, then smeared more on the stem and set it home. I like the stick properties of 407 additive for holding stuff like this in place.

With a gloved hand I smooshed all the oozed epoxy into any voids around the perimeter and smoothed the backing surface. We'll add a load bearing backup such as G-10 to the face of this when the bow-eye is installed later.

Dressing up the Bilge

Installment 33 of Mako Project


Before we close up this bilge, a fresh coat of paint will pretty her up and add protection.


We grabbed some Interlux Bilgekote and painted the center span the length of the boat.

You may notice the setting of boat has changed also. With warm summer near, we've moved the old Mako into the unheated warehouse building where we can kick up dust with reckless abandon. Having the boat on two of these PWC dolly's is slick. Any time we need to slide her over, we just pull the boat stands and give a shove. The casters allow you to spin her in place or roll her across a parking lot. Much easier than pulling a trailer.


Bilgekote is easy, one part application you can spray, brush, roll or roller-tip. Since this is going over freshly laid fiberglass, we prepped with a quick sand to shake off the amine blush followed by a shopvac.

We rolled with a semi-smooth 3/8" nap roller and 3" chip brush. Directions say to roller tip bilgekote, but since our unfaired glass has a rough texture anyway, we just rolled it on assuring good coverage. She'll look pretty clean to anyone poking their head down the access hatch. Next we'll replace the stem and bow-eye while accessible.

Tying in Loose Ends

Installment 32 of Mako 19 restoration


Mako feels solid. She's got new stringers, new transom and several layers of new glass in the hull. Before we re-deck this old bird, we want to make sure everything below is shipshape.


Reinforce the chine


To transition that added stiffness from hull bottom to the sides, we reinforced the chine with fiberglass tape over the exposed sides.


We laid in 7-1/2" wide strips of quadraxial cloth the length of the hull from transom to bow.


This area will soon be inaccessible once the decks are re-installed.


This extra reinforcement spreads the stiffness to the sides and should quiet hull flex considerably.


Transom Wrap-up


We glassed one final skin inside the transom to prevent engine bolt creep and maximize stiffness. To recap, our new transom has two layers of 1708 laid on the inner face of the outside skin, two panels of 3/4" Penske core, equaling 1-1/2" total core thickness, then two more layers of the same 1708 biaxial cloth. One more final layer completes the laminate. We laid 24 oz cloth with Trevira backing cut for a generous wrap along sides and bottom.


The cut drapes over the top edge, and the bottom has a generous 8 plus inches overlay on the hull and stringers. This encapsulates those tie-in strips from the stringer installation.


We also wrapped the cut another foot along the sides for added beef.


All cured, it's a huge difference. Any hull deflection around the corners is nearly gone. Extra material on the corners compensates for the missing fish box corner structure left out. It also prevents the symptomatic stress cracks in the transom corners seen in most old boats.


The structural phase of the hull is complete. We're going to move our attention upwards to the gunwales and deck, once we've completed one last dressin-up. The sanding dust in these pictures is prep-work for our next phase- painting the bilge.

Limbering Up

Installment 31 of Mako Rebuild


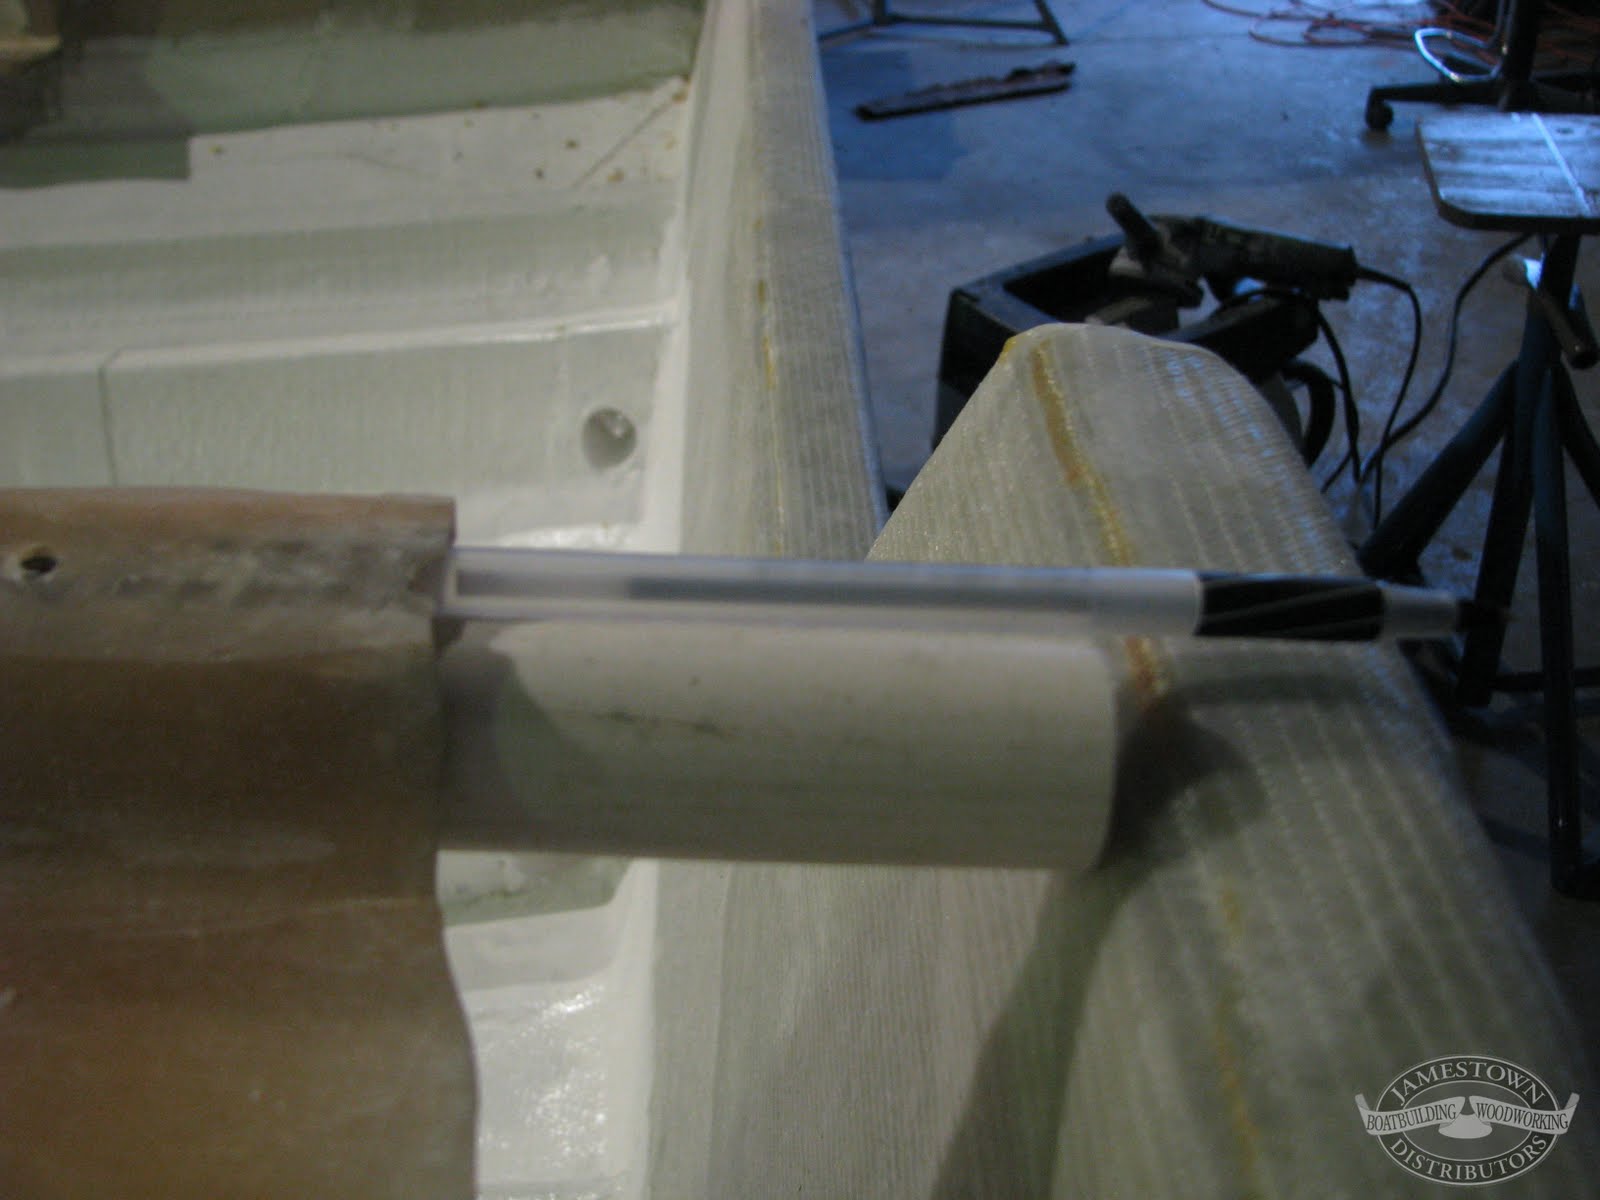
Our foam core stringers are in and look great. We'll add some finishing touches to complete the job. For water to drain into the bilge and out the garboard drain, we cut limber holes. The steps are very easy. TJ grabbed the cordless drill with a 2 inch hole saw. We cut 2 inch PVC pipe the width of each stringer and dry fit them in place.


Once we were happy with the fit, we thickened some epoxy with 407 low density filler and coloidal silica to a thick peanut butter consistency and spread it with a gloved hand over the inside of the hole to seal it. We also added some to the cut PVC and inserted into the stringer.


This gets messy, so have some rags on hand.


We let this cure then returned with a Rotex sander and sanded the tube flush for aesthetics.


With some more of the same epoxy mix, we dressed out the remainder of the area to a smooth finish, trying to keep a smooth transition through the limber hole. This will pass debris up to 2 inch diameter, so it is less likely clog. The PVC lends some structural strength while protecting the integrity of our stringers down the road. Overall, it's a huge improvement over this failed stuff...
While TJ worked on the limber holes, I did some spot repair on stringer butt joints. There were a few unavoidable buckles in our laminate installation caused by the curve of the hull. I ground out the large voids with the RAS sander and 36 grit disc. Once the voids were cleared, I cut some tabs of Quadraxial cloth. Where needed, I filled in with some thickened then laid the wet out tabs over top.


All said it looks pretty darn good. We'll add one last finishing touch on the next post, reinforcing stringer to transom

Monday, March 22, 2010

Tying into transom

Installment 30 of Mako Project


With all the stringers laid in the hull, we had one last order of business to tidy up this installation. From outside the hull, Mike added some tie-in strips of quadraxial cloth.


To tie the stringers into the transom, Mike cut some 14 inch long quadraxial strips to size and attached them to top and 8 inch strips to sides of each stringer and stiffener. We wet out with epoxy and brush and rolled it out with laminating roller. A fourth strip saddled the tabs in place over the stringer.


Because these stringers are already quite high, adding knees to the transom is unnecessary (nor is there much room for them). We'll lock these tabs in place with one more layer of 24 oz 0°-90° inside the transom. This final layer will build up sufficient transom thickness for to carry the heavy outboard.


We had some time to spare with Scott and Mike before their ticket back to the Florida sun. In all, the stringer and stiffener installation took less than one business day to complete using the Preform system, not too shabby. We are extremely grateful for all their help and insight, and very impressed with the results.

The next day, with the epoxy cured dry to the touch, we rolled this old boat out into the light of day, the first time she'd seen the sun since the stringers were removed. She holds her shape with no sagging. Walking around inside the boat or rolling her over bumpy pavement, she feels rock solid, no more walking on eggshells.