Installment XIV chronicling the rebuild of a center console Mako classic
With
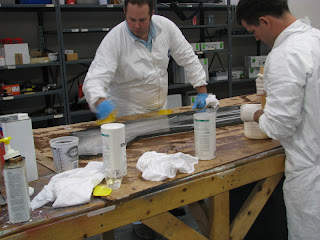
Tyvek suits donned we're ready to roll, like NASA storming down the street to capture ET (unfortunately, camera couldn't catch TJ's glowing finger trick) Thus far we've ripped out all the old rotten stuff, prepped the transom, filled the voids with thickened epoxy, added a layer of
biaxial cloth, and now we're ready to replace the core. For core we've cut out two
3/4" Penske sheets, equalling 1-1/2" total core thickness.

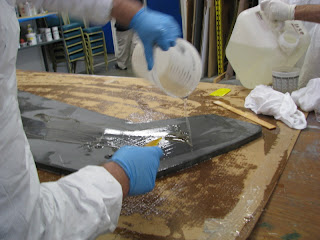
We mixed up neat epoxy using the standard
fast hardener and
105 resin. We spread this on both sides of the first
Penske core sheet to fill in any porosity. We'll do the same to bonding side of the second Penske panel before installing it.

Just before setting the first core sheet in place, we mixed a batch of
thickened epoxy. This we troweled approximately 1/8" thick on the boat where core edges meet hull, and thinner along the inside of the transom skin. The remaining thickened epoxy we distributed evenly over the joining faces of Penske core once the first panel was in place. The thickened mix assures a strong adhesive bond.


We needed a large clamp to secure everything. A couple of boards thru-bolted with long
hex cap bolts and
fender washers on either end did the trick. This kept the core in place under moderate pressure until it cured. (We cut the boards and pre-drilled them beforehand.) A liberal
wax application to the bolts permitted removal post-cure. Though the inside board lay against dry core, a little epoxy slop inadvertently worked in there. Plastic sheeting would have prevented the board from bonding to the core wherever epoxy oozed. This occured to us in after thought and we later needed the
multimaster to pop the inside board free. The bolts passed through the entire clamp setup. We drew tight the 4 hex nuts in sequence, a few turns of the ratchet per bolt to maintain even pressure. The pressure from our makeshift clamp squeezed out any excess epoxy.

Much of the thickened mixture displaced any remaining voids along the bottom base of the core, working to our advantage. We squeegeed away where necessary. Lastly, we braced the top edges with C-Clamps (with plastic sheeting in between). This entire setup was then left untouched to cure overnight.
 With Tyvek suits donned we're ready to roll, like NASA storming down the street to capture ET (unfortunately, camera couldn't catch TJ's glowing finger trick) Thus far we've ripped out all the old rotten stuff, prepped the transom, filled the voids with thickened epoxy, added a layer of biaxial cloth, and now we're ready to replace the core. For core we've cut out two 3/4" Penske sheets, equalling 1-1/2" total core thickness.
 We mixed up neat epoxy using the standard fast hardener and 105 resin. We spread this on both sides of the first Penske core sheet to fill in any porosity. We'll do the same to bonding side of the second Penske panel before installing it.
 Just before setting the first core sheet in place, we mixed a batch of thickened epoxy. This we troweled approximately 1/8" thick on the boat where core edges meet hull, and thinner along the inside of the transom skin. The remaining thickened epoxy we distributed evenly over the joining faces of Penske core once the first panel was in place. The thickened mix assures a strong adhesive bond.
 We needed a large clamp to secure everything. A couple of boards thru-bolted with long hex cap bolts and fender washers on either end did the trick. This kept the core in place under moderate pressure until it cured. (We cut the boards and pre-drilled them beforehand.) A liberal wax application to the bolts permitted removal post-cure. Though the inside board lay against dry core, a little epoxy slop inadvertently worked in there. Plastic sheeting would have prevented the board from bonding to the core wherever epoxy oozed. This occured to us in after thought and we later needed the multimaster to pop the inside board free. The bolts passed through the entire clamp setup. We drew tight the 4 hex nuts in sequence, a few turns of the ratchet per bolt to maintain even pressure. The pressure from our makeshift clamp squeezed out any excess epoxy.